
3/25/2024
Get all your website and ad platform tracking sorted in a couple easy steps.
Updated 11/12/22 - Version 1.1 (what's included)
We've updated the tag manager template library to include:
Hubspot Form Events - Added a custom event on hubspot form submissions, sending these to various platforms such as Google Analytics, Meta, and more.
Segment Tag & Events - Added segment base tag and event tags for common website interactions and events. Currently set to standard event tracking, but can change to object / action and add more values.
Salesforce Audience Studio Tag & Events - Added SF Audience Studio base tag and event tags for common website interactions and events. Customs objectives and values accordingly.
Persist UTMs across other domains on your website - If you have a link to a different domain (e.g. a hubspot booking form) which performs a certain interaction, but does not redirect to the first domain the user landed on, you'll likely lose campaign tracking. The interaction will often show as 'direct' in Google Analytics, Hubspot and other platforms. This script will append original UTM parameters to the domains you choose, allowing you to properly assign the source, referrer and campaign name from where the user came from.
In order to understand the effectiveness of your campaigns and the engagement of your website, it’s essential that you’re measuring purchases, leads and other interactions for your business. You need to be sending these interaction ‘events’ to the various platforms you use, such as Google Analytics, Microsoft Ads, Google Ads, Meta Ads, LinkedIn Ads, Tik Tok Ads and more.
Whilst many common website CMS’s and platforms have their own integrations, it can be a bit of a spaghetti nightmare to manage these integrations, which often have different naming conventions and methods for how they send events to your ads and analytics platforms. That is why we prefer to use Google Tag Manager as a source of truth for all of our tracking requirements, if possible.
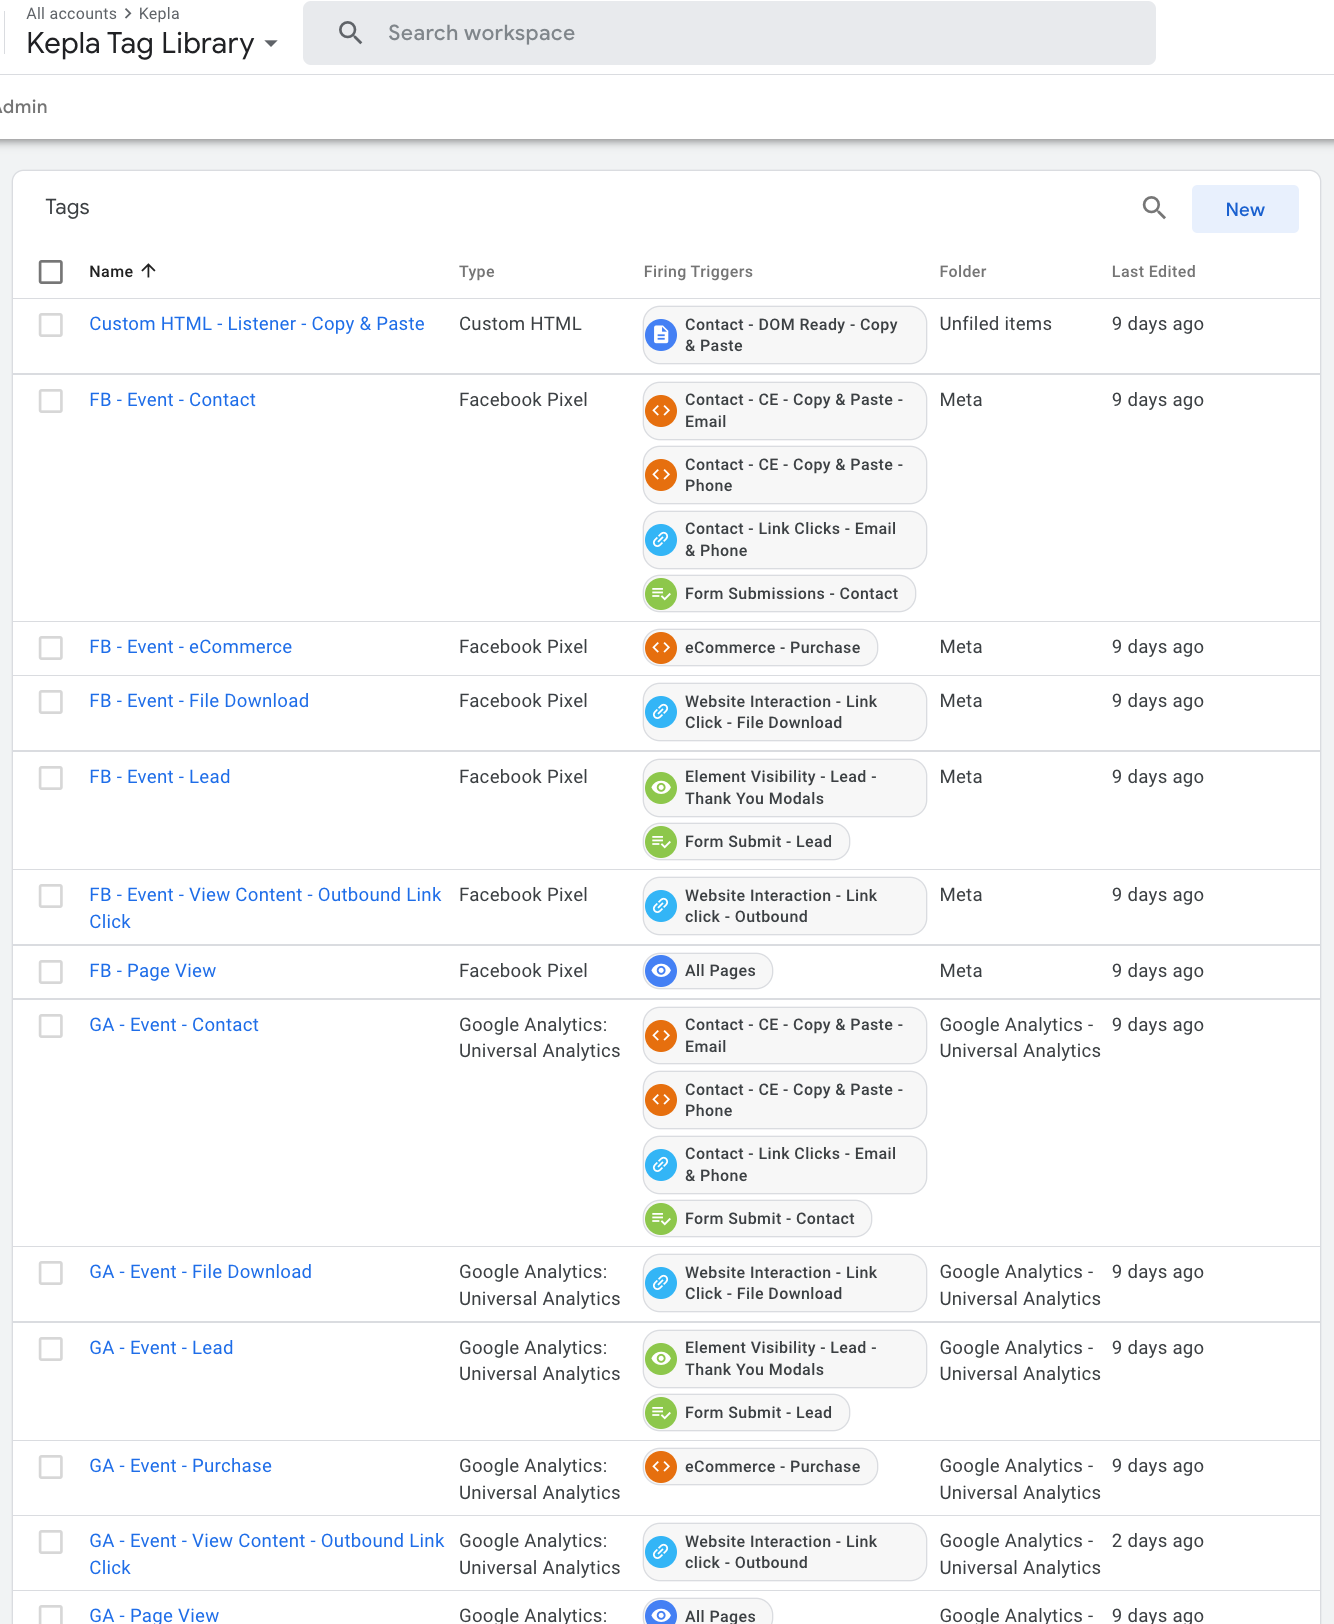
Hence, we are please to release version 1 of our Google Tag Manager tag setup for you to implement across your business, or the customers you work with. As a starting point, it provides a good base foundation to track leads, sales, contacts and other events, populating them in each platform. Most of these tags are using standard template tags, or those found in the tag gallery. We've also organised them into folders based on the platform the tags are referencing. Couple this with the likes of RescueMetrics and you’ll be better equipped to measure your campaign performance and save a bunch of time in having to set everything up from scratch.
It gets even better… We will be regularly adding more enhanced tracking functionality and referencing approaches we’ve seen in the wild so keep your eyes peeled for updates and sign up to our Beta waitlist, as we’ll be regularly sending out content and tools for you to use.
There are some caveats to this setup, especially if you are wanting to track interactions within iFrames or across different domains. If there are particular tracking requirements that you are getting stuck with just reach out to us, we are more than happy to help.
Again, this is just a starting point and will still need a bit of configuration, so it’s best to work with a specialist who can help refine your tracking setup.
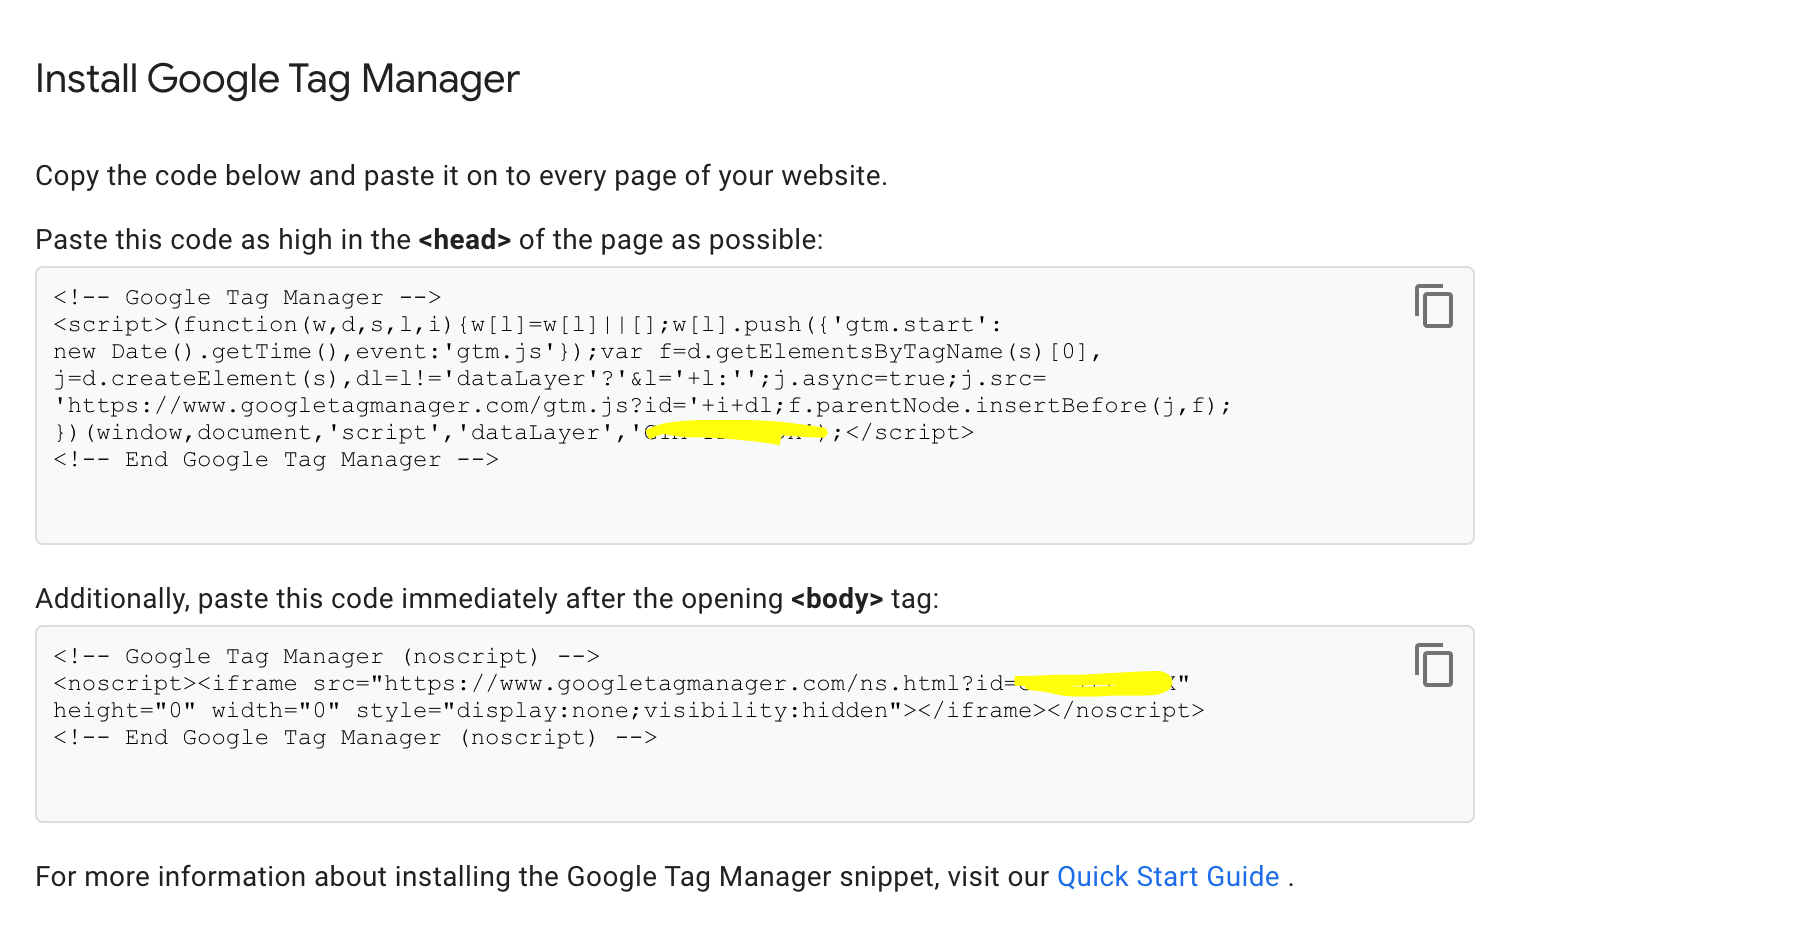
You need make sure you have Google Tag Manager installed on the website. There are a bunch of approaches to do this depending on the CMS you are using, which we have linked below:
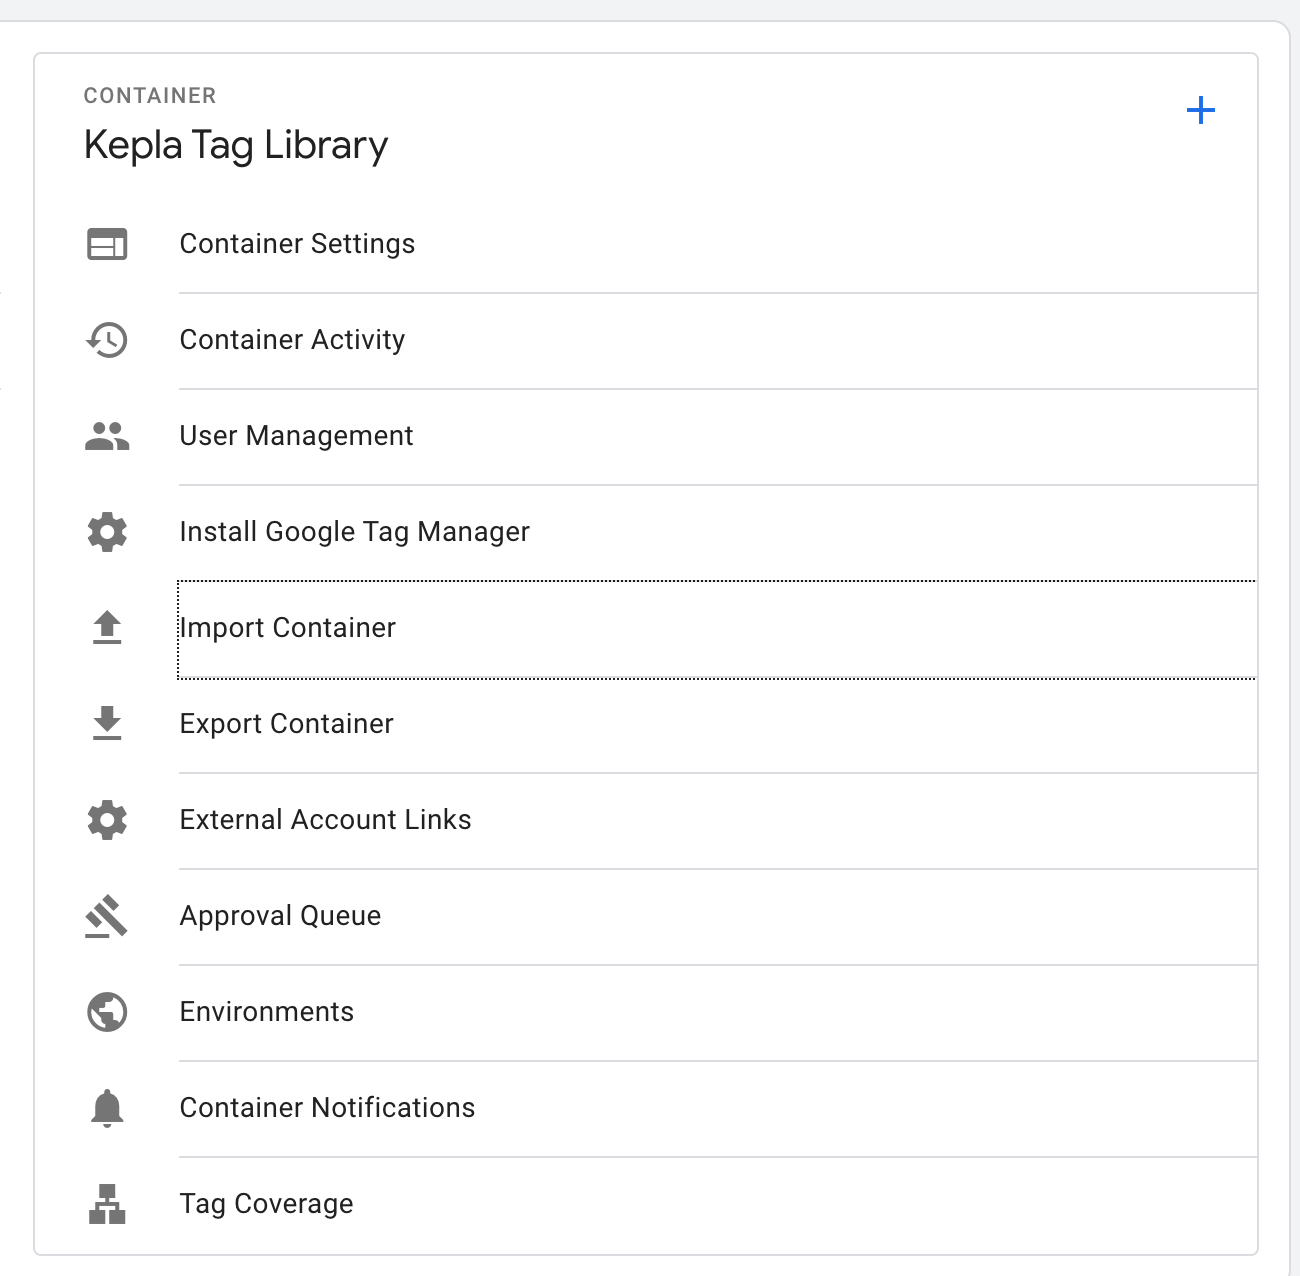
Simply import the file below by going completing the following actions:
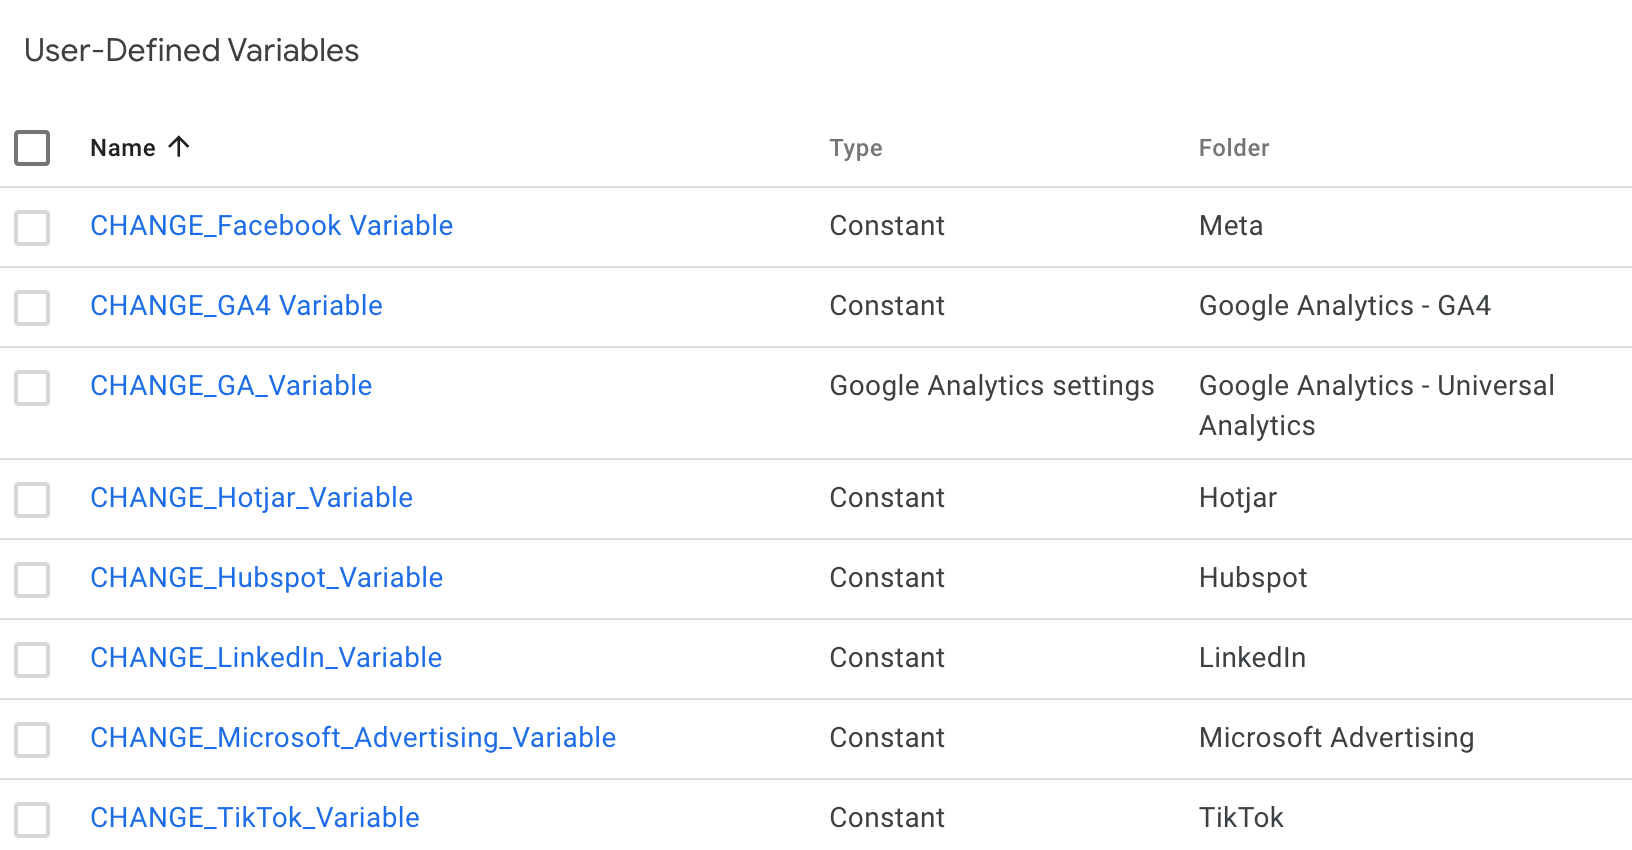
You will need to make sure you update all the variables with the relevant pixel or measurement ID’s - these can be found in the respective ad platforms. The variables you need to update are ‘
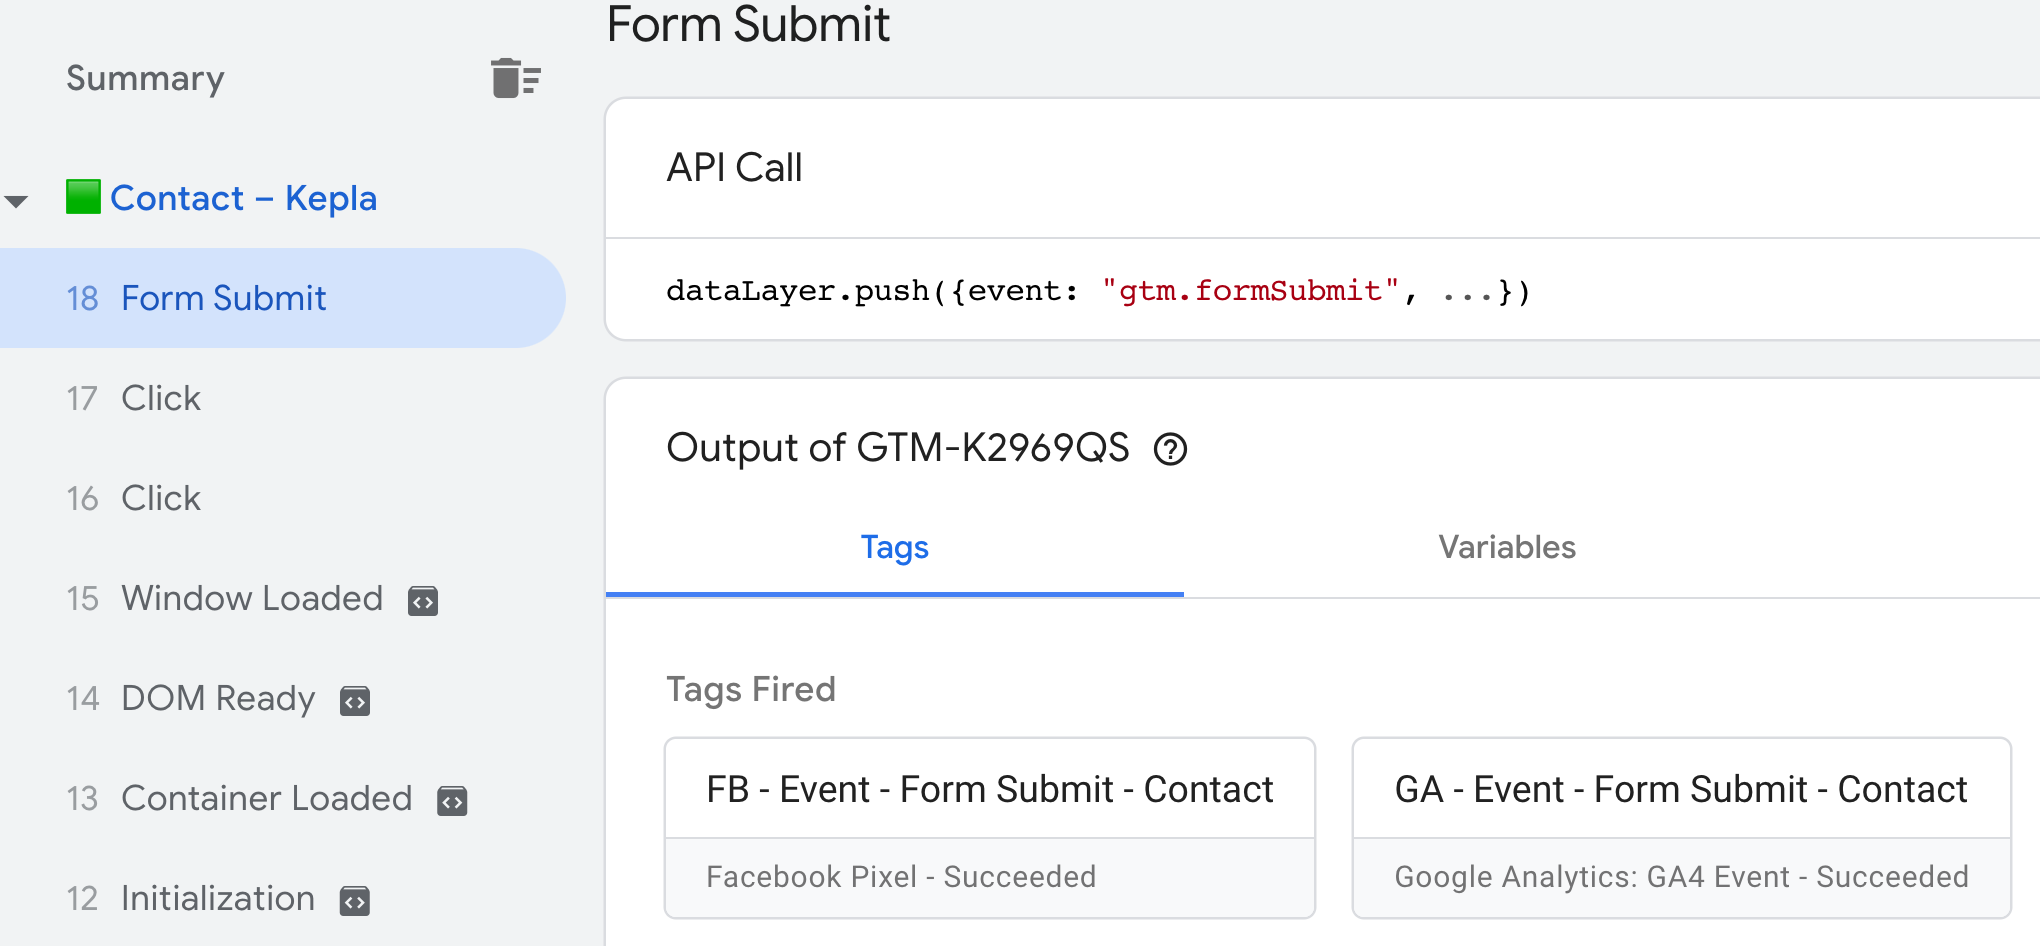
Go into ‘Preview’ mode and test out the tags to make sure they are firing correctly. You may need to adjust some of the triggers, based on the page paths, form ID’s or classes, and more. If you are having trouble with a particular trigger, you can get in contact with us at hello@kepla.io.
You should be all good to go, if you are having trouble with any of the tags, or want to track certain interactions across your website please reach out to hello@kepla.io.
You don't have to worry about going into each ad platform, configuring settings, and structuring your campaigns for success.
Get startedBook a demo


Kepla Systems Limited © 2023. All rights reserved.
Proudly based in Aotearoa New Zealand.
.jpg)

.jpg)